Thursday, December 22, 2005


Mise En Place
Many beginning or occasional cooks are intimidated by long lists of ingredients. First, they have to collect ingredients that they may not have immediately available, but second, they have to prepare them all. That prep work stops people even if the ingredients are common items such as onions, garlic, carrots and parsley. Why? Too many people try to do the prep while cooking. They start down the recipe step by step, working to gather and chop ingredients as they reach them. Needless to say, this approach is less than efficient, but it is also the cause of much stress and overcooking. It is tempting to think that during the 10 minutes that your onions and garlic are browning leaves you with enough time to cut up your chicken into bite size pieces, or that you can easily find and grab the paprika just when you need it. But, even the best laid plans often go awry, and suddenly your onions scorch while you are trying to avoid losing fingers as you chop at high speed. How do you avoid this situation? Copy restaurant chefs; use a mise en place.

Mise en place is the French term for advance prep when cooking. Here, it commonly refers to the chef’s set-up of all the pre-measured and prepared ingredients needed for that night’s meal service. Planning and preparing all the ingredients in advance is not only more efficient, it allows you to focus entirely on the actual cooking of the meal you are making. On the efficiency side, you may have two or three dishes that share a common ingredient (perhaps onion or parsley). It is much faster to measure and chop enough for all the dishes than to repeat the process each time you need it. Also, having everything at hand enables you to add ingredients at the perfect time. It is no problem if something cooked faster than expected; the ingredients for the next step are ready to go.

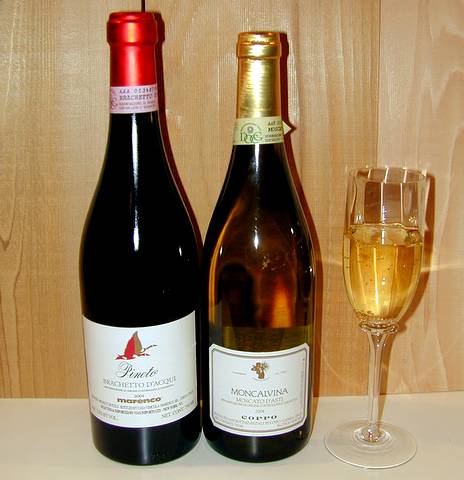
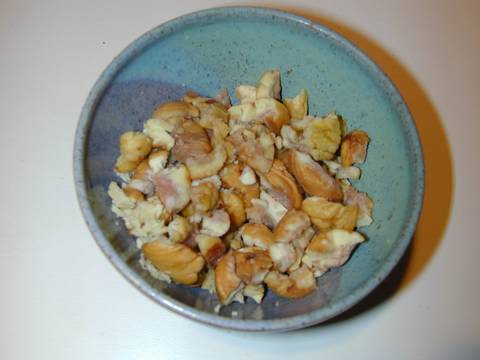
The picture above shows part of my mise en place for Pollo al Vin Cotto (Chicken with “Cooked Wine”) from Molto Italiano by Mario Batali along with its supporting dishes (including homemade Fettucine with Lemon). It is nowhere near as complicated as it looks. Over the years, I’ve assembled quite a collection of glass and metal bowls for storing ingredients. I bought a dozen or so of the little metal cups you see in seafood restaurants for holding the dipping butter that accompanies boiled lobster. They are incredibly cheap and are perfect for holding spices or a few tablespoons of chopped flavorings. I collect, prepare and measure all the ingredients for all of the recipes I’m preparing before I do any cooking. Each ends up in the appropriate sized dish. If a group of ingredients are going to be added at the same time, I mix them together. My whole collection sits within easy reach of the stove as I start to cook. It’s easy and fast!

If you don’t already do so, try using a mise en place the next time you cook. I guarantee that once you are used to it, you’ll be faster, your dishes will come out better and you’ll enjoy cooking more. As a final bonus, if you have guests that like to watch you cook, the mise en place lets you entertain and cook at the same time without worrying about chopping a finger when you are distracted!

Friday, December 16, 2005


A Couple of Great Piedmont Dessert Wines

Years ago, sweet wines had a bad rap. Cheap sweet wines had few virtues other than being easy to drink. Mass produced, low quality sugary wines caused many a hangover and killed the market for Sauternes and other high quality dessert wines. It became fashionable to say that one disliked sweet wines while drinking white zinfandel and other supposedly dry wines that still contained residual sugar. People wouldn’t even try a wine that was billed as sweet. Fortunately, times have changed and great sweet wines are becoming more accepted and more available. This post covers a couple of dessert wines that will convert connoisseurs and non-wine drinkers alike. These Italian wines are light and versatile and will immensely add to any holiday celebration.

Both of these wines are from the Piedmont section of Italy, an area best known as the home of Barolo. But this region also makes a number of very interesting and flavorful dessert wines. The two wines reviewed here are frizzante, which means lightly sparkling. Not like champagne, but just enough bubbles to add interest and elegance. They are also low alcohol, coming in at only 4-6% rather than the 13% to 16% range of most table wines. These attributes make these wines very welcome as the closure for a heavier holiday meal. The only downside is that they will take a little searching to find. These wines are not meant for aging, so go with the currently available vintages.

Let’s start with the most obscure first. Brachetto D'Acqui is a light, sweet red wine. Don’t let the red part throw you, the wine is very refreshing and the color adds only to its appeal. Brachetto D’Acqui has a wonderful bouquet of rose petals and raspberries. It is lightly sweet and acidic enough to ensure that the sweetness isn’t at all cloying. It tastes strongly of raspberries, strawberries and other red fruits. These characteristics make this wine highly versatile and even allow it to match with chocolate. Brachetto D’Acqui is one of the few wines that not only goes well with chocolate, but is actually synergistic, bringing out the best in both. You can find good bottles of Brachetto D’Acqui for less than $20. Some good choices include:
• Marenco Pineto
• Alasia
• Viticoltori Dell' Acquese

Moscato d’Asti is a beautiful golden wine made from Muscat grapes. These grapes produce fragrant wines with highly floral bouquets that have notes of peach, apricot, pear and even orange. These flavors repeat in the mouth and the top examples of this wine have surprising complexity and depth of flavor. While cheap versions of Muscat-based wines can be found, a few extra dollars buys considerably more nuance and pleasure. My current favorite is Coppo’s Moscato d'Asti Moncalvina. It is a single vineyard wine of tremendous quality. I was blown away the first time I tried it. If you can find it (or one of its relatives), you’ll be blown away too. Highly recommended! The price is reasonable, this wine can be found for $20 or so, and other good examples can be found in the $12 to $20 range.

Saturday, December 10, 2005


Peeling Chestnuts

To me, few food items bring more joy to late fall than chestnuts. I love them! I clearly remember the smell of chestnuts roasting at street carts near Central Park in New York as a child. The sweet, nutty flavor and slightly mealy texture makes a delightful foil to roasted dishes of all types. But for all their joys, chestnuts can be a considerable pain in the neck to prepare.

I recently decided to try several methods of cooking and peeling chestnuts to see which approach works best. I followed the roasted and boiling methods recommended in the Silver Spoon cookbook (the recently translated Italian “Joy of Cooking” equivalent) and Julia Child’s recommended method from ”The Way to Cook.” I also experimented with three slicing methods for scoring the shells before cooking (one slice down the middle of the flat side, the traditional “X” cut across the flat side, and Julia Child’s method of cutting away the edges of the flat sides).

The verdict? By far the easiest and best for getting shelled and peeled chestnuts is Julia Childs. And for all methods, the Julia Child cut works best, followed by the traditional “X”. By not really cooking the chestnuts before peeling, Julia Child’s method does the best job of providing beautiful, whole nut meats. Flavorwise? The roasting method easily produced the most flavorful nuts in the opinion of al tasters. By not using water, it concentrates the natural chestnut flavors. Since the nuts are fully cooked, they are ready to eat, but most break up a bit on deshelling.


Julia Child’s Method
Cut a strip of the shell of the shell of the chestnut on the flat side (as show in the picture). I found that the chestnuts were easiest to peel when very hot, so I wore clean dishwashing gloves and switched to cooking fewer at a time than Ms. Child recommended. Boil a small pot of water and add 3 chestnuts at a time. Cook for about 1 minute. Pull out the first chestnut and peel rapidly. Pull off the shell and rub the skin to remove. You may need a small paring knife to cut skin out of the folds. If the skin won’t come off easily drop the nut back into the water while you work on the next nut. I found that about ½ of the skins came off on the initial shelling, the remaining came off after one reheat. Retrieve the net nut and repeat. Add three more nuts to the water when you remove the third one. Chestnuts prepared in this manner need to be braised or otherwise cooked before eating.

Silver Spoon Roasting Method
Preheat the oven to 350° If you are a traditionalist, “X” the chestnut, otherwise, use the Julia Child cut. Roast on a tray for 30 minutes. Peel as quickly as possible, as they are easier to peel when hot. Chestnuts prepared in this manner are ready to eat and can be chopped and added to recipes at the last minute.