Sunday, November 27, 2005


Thanksgiving Dinner

Thanksgiving is my favorite holiday. No surprise there. Of course I like the food related aspects of the holiday, but more important is consciously appreciating that food and giving thanks for being able to have it and share it with family and friends. And, at least thus far, Thanksgiving has yet to reach the level of crass commercialism that nowadays plagues Christmas.

Since Ms Issippi was up from the Delta to partake in Thanksgiving, a few themes and constraints were suggested. She is a vegetarian (but will eat seafood), so we needed a little accommodation, and we wanted a menu that echoed the South, but also reflected our New England home and gave a nod to our European background. Here’s what we came up with:

Prelude
Nuts and Tangerines

First Course
Lobster with homemade mayonnaise on Endive

Veuve Clicquot Ponsardin Champagne NV
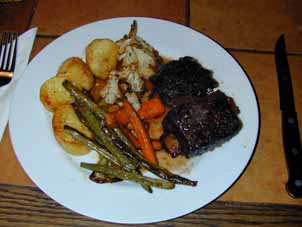
Main Courses
Brined, Maple Glazed Turkey with Pan Gravy
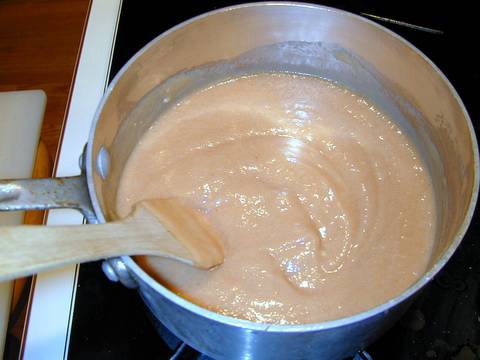
Cranberry Cumberland Sauce
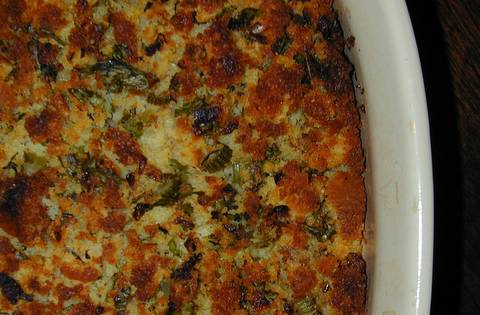
Mississippi-style Cornbread Stuffing
Sautéed Mushrooms with Rosemary
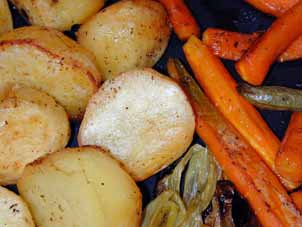
Roasted Brussels Sprouts with Chestnuts
Rum Glazed Sweet Potatoes

Ken Wright Cellars, Pinto Noir, Nysa Vineyards 2000

Intermezzo
Homemade Lemon Rosemary Sorbet

Cheese Course
Italian Bricco Cheese with Membrillo

Desserts
Pumpkin Pie with Vanilla Ice Cream
Tarte Tatin aux Poires


Domaine de a Motte - Coteaux du Layon Rochefort 1979


Peggy Knickerbocker’s “Simple Soirees” provided the base for the menu and was the source for Cornbread Stuffing and Sweet Potato recipes as well as the starting point for the Lobster and Endive first course. To remain vegetarian, I used butter rather than bacon fat for the stuffing and baked it separately with vegetable stock for moistening. The Cranberry Cumberland sauce is a modified version of a recipe found in “The Vegetarian Epicure” by Anna Thomas, my original hippy cookbook. It’s the only dish that I make every Thanksgiving for continuity. Everything else is open to experimentation or substitution.

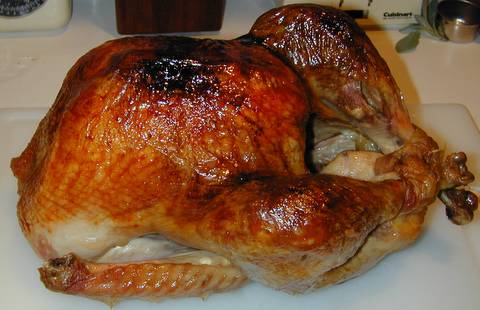
For the turkey, I definitely think brining is the way to go. The result is a much juicer turkey for the dinner and far tastier leftovers for sandwiches.


Brined Turkey with Vermont Maple Syrup Glaze


  • 1 10-12 lb free range, fresh turkey


Brine


  • 1 gallon water

  • 2 cups kosher salt

  • 1 cup dark brown sugar

  • 1 Tablespoon allspice berries

  • 2 tablespoons black peppercorns

  • ½ cup whiskey

  • Plenty of ice

  • 1 gallon ice water

  • Large plastic bin

  • Two large plastic bags (trash bag sized)


Maple Glaze


  • 1 cup chicken or turkey stock

  • 1 stick butter

  • ½ cup Vermont Maple syrup

  • Salt and pepper to taste

Start early the night before. In a large pot, mix together the first gallon of water, salt sugar, allspice and peppercorns. Bring to a boil and ensure the salt and sugar are fully dissolved. Allow to fully cool. If possible, cool further in the refrigerator or outside to get the liquid to refrigerator temperature. Mean time, remove the turkey gizzards, etc. and rinse the turkey well. Dry the turkey and rinse its inner cavity with whiskey to knock off any lingering odors. Don’t worry about draining the whiskey, it will add flavor to the brine!
Mix some of the ice with water to create the second gallon of ice water and add to the pot of cooled brine. Put the turkey in the first plastic bag, then into the second (for strength!). Place in the plastic bin. With help, pour the brine into the bag with the turkey. Squeeze out as much air as possible and seal with a twister seal. Seal the second bag as well. Set the bird breast side down to start. If your refrigerator is large enough to hold this container, you’re really luck! If not, surround the turkey with bags of ice and put the bin in a cool location. Let it brine 8 to 12 hours or so (overnight) and turn the bird on occasion if possible to ensure even brining. After brining, I remove and dry the turkey and let it air dry in the refrigerator (without the bin!) The air drying will allow the skin to crisp in the oven.

To make the maple glaze, mix together the stock, butter, maple syrup, salt and pepper. Heat to a boil, whisking thoroughly. Remove from heat.

To roast the turkey, Preheat the oven to 325 degrees. Put the turkey on a rack in a large roasting pan. I don’t stuff my turkeys, I prefer to cook the stuffing separately. Roast the turkey about 20 to 30 minutes per pound, basting every 20 to 30 minutes with the maple glaze and using pan drippings after the glaze has run out. Using a thermometer, the meat in the thickest part of the thigh should be between 165° to 170°. Allow 20 to 30 minutes to rest (covered with foil) before carving. If you like gravies, the pan drippings will make a fabulous base for one!

    Sunday, November 20, 2005


    Roasted Vegetables
    As Thanksgiving approaches and the nights are getting colder, good roasted vegetables come to the forefront of my cooking routines. To me, they are highly satisfying comfort food with the added bonus of being easy to prepare, highly flavorful and making a great side or even main dish. Roasting has a way of concentrating and intensifying the natural flavors of the vegetables and brings out their sweetness. I’m surprised how few home cooks roast any vegetables other than potatoes or an occasional squash. I roast all forms of root vegetables, garlic, onions, leeks, Brussels sprouts, cauliflower and even green beans. I roast them individually as a side dish or together to make a full meal.

    Basic Roast Vegetables

    • 1 head of garlic

    • Olive oil

    • Vegetables for roasting (any combination of those listed above)

    • Fresh herbs (thyme, oregano and/or rosemary) in sprigs

    • Pimentón ,

    • Salt & Pepper


    Preheat the oven to 350 degrees. Peel and quarter potatoes (or cut into 1 inch chunks if the potatoes are really large). Peel carrots, parsnips, turnips and their ilk. Cut into chunks. I like to split large carrots into quarters lengthwise then cut the four pieces in half to create sticks. Peel and quarter onions. Cauliflower and broccoli can be broken into large florets. Clean and remove the stems of green beans. String them if they are large or could be tough.

    Pour a few tablespoons of olive oil into a large roasting pan. Throw in the veggies, sprinkle with salt and black pepper to taste. Lightly sprinkle with pimenton to add a little color and smokiness. Break the head of garlic into cloves (you don’t have to peel them) and scatter the cloves among the veggies. Toss well to get everything coating with a little oil. Spread the herb sprigs over the top. Roast for 45 minutes to an hour, tossing the vegetables on occasion to promote even browning. Test each type of vegetable regularly for doneness with a fork. Depending on the type of vegetables used, their age and the size of the chunks, you may need a little more or less time. It’s okay for green beans, leeks and other vegetables to get quite browned. We’re aiming for a crispy crust on the outside and soft on the insides.

    Serve on their own as a main dish (I like a big steaming pile with a little mustard as a condiment) or as a side dish with roast chicken, beef or pork. Leftovers reheat well in the oven and they can be made into a killer soup.

    Wednesday, November 16, 2005


    Persimmons

    A late autumn fruit, bright orange persimmons are just showing up in the market. A perfect, ripe persimmon is now one of my all time favorite fruits. It is best served fresh and juicy and has a rich, sweet flavor with nuances of hazelnuts.

    It took me a while to understand persimmons. Like all too many commercial fruits, it shows up in supermarket produce sections severely under-ripe and without any instructions for its use. The first time I saw one, I brought it home, hard as a rock, cut it in half and took a bit. It was so astringent, it was akin to over steeped tea or a painfully tannic wine. Thinking I may have gotten a bad one or that perhaps it should ripen a bit more, I tried again a few times. Each time I ended up with about the same results. I gave up. But fortunately, I had forgotten one extra persimmon in the fruit bowl. By the time I noticed it, it appeared overripe. It was soft as a baby’s behind and seemed almost like liquid inside. I might have thought it was going bad, except that it smelled so sweet and enticing. I cut it in half, scraping the extremely soft, juicy flesh up with a spoon. It was a revelation! The astringency was gone and the resulting fruit became nectar-like in intensity. So now I understand why people love persimmons!

    To enjoy persimmons yourself, look for the bright orange hachiya variety. It is shaped a little like an acorn. The perfect persimmon is a deep rich orange with no trace of yellow or dark brown blotches. If the persimmon is ripe (an unlikely case in most supermarket produce sections), it will be almost meltingly soft. More likely, you’ll have to bring it home and ripen it yourself. You can speed the process by putting the persimmon in a paper bag with an apple or bananna. You’ll probably want to ripen several at a time. It’s hard to stop once you’ve had a really good one!

    To serve, simply cut it in half and provide a spoon. Scoop up the soft, runny flesh and enjoy! You don’t eat the skin.

    Sunday, November 13, 2005


    Mango Sorbet

    It seems kind of strange to be writing about Mango Sorbet in November as the weather is getting colder, but I found some great, ripe mangos in the produce store and I couldn’t resist. The wonderful thing about this dessert is its consistency. It has a creamy richness and depth of flavor that make it seem more like a gelato than a simple fruit puree. I’ve adapted this recipe from the Williams-Sonoma “Ice Creams & Sorbets” cookbook, modifying it to eliminate the corn syrup (which I never seem to have around when I want it) and adding the flavors from a favorite Jacques Pepin recipe for Mangos with Lime and Cognac. The Pepin dessert is prepared with fresh, cubed mangos and is good as a light dessert or even as a breakfast fruit bowl (don’t worry, there’s not much Cognac in it!) It struck me that the same combination would make a great sorbet.

    A quick note on the ice cream maker. I use a Williams-Sonoma gelato maker that was purchased as a splurge several years ago. It has its own refrigeration unit, a powerful motor and has the ability to make two sequential batches of sorbet. If you like ice creams and sorbets, it is worth every penny and simplifies ice cream making enough to encourage you to experiment. (Two particularly successful experiments created Persimmon Sorbet and Cosmopolitian Sorbet. I’ll post those recipes sometime in the future.) However, any decent ice cream maker will work just fine.

    Mango and Lime Sorbet

    • 2 to 3 large ripe mangos

    • 1 Lime

    • 2 or 3 tablespoons of Cognac

    • ½ cup plus 2 tablespoons of sugar

    Peel the mangos and remove the flesh. I’ve seen many methods for peeling, but I’ve had the most success with a very sharp vegetable peeler. When cutting the flesh, don’t try to be too efficient; the flesh closest to the pit can be very fibrous. Puree the mango flesh in a food processor or blender. Measure the volume of puree, you should have about 1 2/3 cups. If you have significantly more or less adjust the volume of sugar and Cognac appropriately.

    Juice the lime and peel the rind. Use only the thin green layer of the peel, the white pith is bitter. Very finely mince the peel. (Alternatively, you can use a grater). Add the juice and peel to the mango puree along with the sugar and Cognac. Mix well and chill in the refrigerator until quite cold.

    Prepare the sorbet following the instructions for your ice cream maker.

    Sunday, November 06, 2005

    Membrillo
    Membrillo is the original inspiration for this blog. Although I have been Internet active for many years, it was the search for a Membrillo recipe that caused me to stumble into the world of food blogs. Membrillo is a Spanish version of quince paste and is a truly glorious condiment with cheese or as a little desert on its own.

    If you are not familiar with quince, it is a fruit that looks like a yellow cross between a pear and an apple. A good, ripe quince has an amazing floral and sweet aroma, but the fruit has to be cooked to be truly edible. High in natural pectins, quince is frequently used to help thicken and set other jellies. If you thicken it enough, you get a paste solid enough (like the consistency of the insides of a gum drop) to slice. That’s Membrillo.

    In Spain, a slice of Membrillo is often served atop a slice of well-aged Manchego cheese. The combination of sweet and salty is sublime. If you have access to a good cheese shop, you are likely to find small packages of artisanal Membrillo there. But being the fanatic (or food dork depending on your point of view) that I am, I had to see if I could make it myself. So I searched for a recipe. It was harder than I thought. I found a few, but they varied widely in techniques and my first attempt, shall we say, fell way short of the mark. I promised myself that if I could perfect the technique, I’d post it on the web for others to use. After much experimentation, the result is the following recipe.

    Membrillo

    • 6 medium quince, scrubbed and dried

    • 2 to 3 cups of sugar or more

    • Flavoring options: lemon juice, lemon rind, ginger, spices


    Preheat the oven to 350 degrees. Put the quince in a baking or roasting pan and seal the top with foil. Bake for about 2 hours or so, until the quince is tender. I find that baking concentrates the flavor, removes some water and makes the quince easier to peel. Other recipes call for peeling and boiling the quince, but I found that roasting is easier and produces a better end result.

    Allow the quince to cool somewhat after its removed from the oven and peel and remove the core and seeds. A melon baller works really well for this task. Cut up the pieces and puree in a food processor. If the mixture is too thick you can add a little water to thin it (a quarter cup at a time), but you’ll extend your stirring time in the next step. I try to avoid the water if possible.

    Use a food mill (the easiest option) or force the puree through a sieve. Measure the quantity and add an equivalent amount of sugar cup for cup. If you want the end result a little less sweet, you can cut back the sugar somewhat, but be careful, it is easy to get a too tart result. Put the sugared puree into a heavy sauce pan and add flavorings if desired. I like adding the juice of half a lemon plus a teaspoon or so of grated for very finely minced lemon peel. Finely minced fresh ginger root is also excellent or you could add cinnamon, ground clove or similar spices.

    Put the flavored mixture into a heavy sauce pan and get ready for a lot of stirring. Cook over moderate heat, stirring constantly. The mixture will start to get thick and boil and can throw a lot of hot splatter. I cover my stirring hand with a kitchen mitt or a welder’s glove (an idea from Alton Brown!) Over time, the color will become a beautiful, deep rosy brown and will eventually start to pull away from the bottom and sides of the pan. I find it takes at least 25 to 30 minutes (and more if you have to add water!). But don’t let dissuaded by the effort, you’ll end up with enough Membrillo to last for months and it will be worth every minute.

    Lightly oil a deep glass baking dish and pour in the mixture. Smooth the top with a spatula and let it cool. Put it in the refrigerator, loosely covered with plastic wrap and let it firm up overnight. Run a knife around the edge of the paste and invert the baking dish to unmould. Wrap it well in plastic wrap and store in the refrigerator. It keeps for many months, but it will be long gone before storage becomes an issue!

    To serve: Slice a little and eat! Cut into small cubes and dust with sugar to serve as petite-fours after dinner. Or best of all, pair a slice with a slice of Manchego or another flavorite cheese. Enjoy!